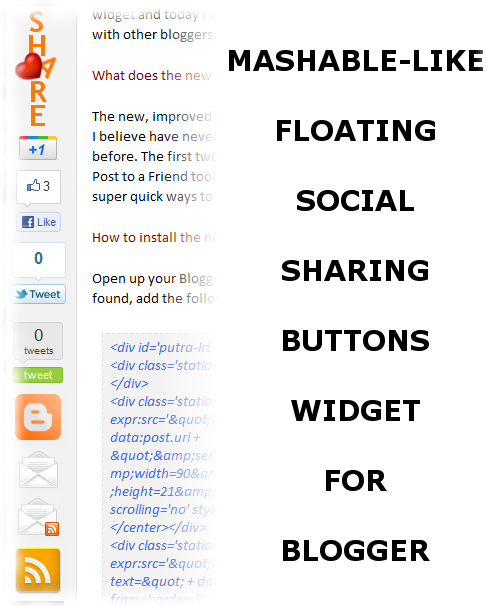
I have grown tired of trying to find ways to solve horizontal alignment problems that normally come with the use of share buttons such as Facebook and Twitter. Finally made the decision to remove everything from my blogs and adopt something that was originally inspired by Mashable.
Yes, Mashable still has it on their blog and I have been using something similar for about 3 days now. So far, so good! I can even say that the newly-installed floating social sharing buttons widget (you can see it on the left-had side) has brought some pleasant results! Better traffic and engagement in just a few days!
There are several good tutorials out there that can show bloggers that are using Blogger the necessary steps in installing similar widgets. I have chosen the one made by Raju, the marvelous blogger behind simplebloggertutorials.com since his instructions are crystal clear! Well done, Raju!
On the 3rd day, I added a few new additions to my floating social sharing buttons widget and today I thought it would be great if I share the new, improved version with other bloggers.
What does the new floating social sharing buttons widget has to offer?

The new, improved widget offers bloggers that are using Blogger 4 new buttons that I believe have never been used by other bloggers on their own floating widgets before. The first two new buttons nicely integrated Blogger’s BlogThis and Email Post to a Friend tools, the other two are integrated with FeedBurner, giving visitors super quick ways to subscribe to our RSS feeds either by email or via FeedBurner.
How to install the new, improved floating social sharing buttons widget to Blogger
Open up your Blogger template and look for your <data:post.body/> data tag. Once found, add the following codes BEFORE your <data:post.body/> data tag:
<div id='putra-lrt'>
<div class='station-gp'><center><g:plusone annotation='none'/></center></div>
<div class='station-fb'><center><iframe allowTransparency='true' expr:src='"http://www.facebook.com/plugins/like.php?href=" + data:post.url + "&send=false&layout=box_count&show_faces=false&width=90&action=like&font=arial&colorscheme=light&height=21&appId=200228286715128"' frameborder='0' scrolling='no' style='border:none; overflow:hidden; width:55px; height:62px;'/></center></div>
<div class='station-tw'><center><iframe allowtransparency='true' expr:src='"http://platform.twitter.com/widgets/tweet_button.html?text=" + data:blog.pageName + "&count=vertical"' frameborder='0' scrolling='no' style='width:55px; height:65px;'/></center></div>
<div class='station-bt'><center><a expr:href='data:post.sharePostUrl + "&target=blog"' expr:onclick='"window.open(this.href, "_blank", "height=270,width=475"); return false;"' expr:title='data:top.blogThisMsg' target='_blank'><img src='https://blogger.googleusercontent.com/img/b/R29vZ2xl/AVvXsEhhd9FsFnhw8nDRWBCA6tqq6YKxk5hLkYJZXfqJvKl3NVU1QrssREBOPOPXdHL3Q3wUA9O0ZVYClFQCgVjpmWFKUlsYutdncXGFW_gf8SsWU0w4xp4U3sjfGuPvcbo1aFJLoWowNvphR-E/s800/blogger.png' width='48'/></a></center></div>
<div class='station-ma'><center><a expr:href='data:post.sharePostUrl + "&target=email"' expr:title='data:top.emailThisMsg' target='_blank'><img src='https://blogger.googleusercontent.com/img/b/R29vZ2xl/AVvXsEgvf1BpK45q0eniZ50ZHna5gbzgojW04EX2F1MItgWwaVWDMwi80o2ZFwDKXOmMX9khL6rZTsYrZ6s5QHPGVmh6eM8qdyHeS1tZC2d0wT5mWdejZwazEZ2VW0KzTTsp29DeDiJUn2dEzFY/s800/email.png' width='40'/></a></center></div>
<div class='station-er'><center><a href='Your Email Subscription Link' target='_blank' title='Subscribe by Email'><img src='https://blogger.googleusercontent.com/img/b/R29vZ2xl/AVvXsEhcVl192L9GZOgRwgzmXnSXnNg8G-LQrl_8oke5hfwbkv2MU-x3AaizjIF31RseyAcz0aodpeK7cMm54czmX9wYxQiPrtMzQTIiFf11FXoQijbtdiFoei9Iv9oSSg9nS9pxH-KJCZ_v5ag/s800/email-rss-.png' width='42'/></a></center></div>
<div class='station-rs'><center><a href='Your RSS Feed via FeedBurner URL' target='_blank' title='Subscribe via FeedBurner'><img src='https://blogger.googleusercontent.com/img/b/R29vZ2xl/AVvXsEiL8yDhtkdBALVIN1MHiw_ligt7evLgqcha3JpmArc7dU8Grg06xseLfJibAA-w4f_UCV66G4YjmOJfb7pdbyHyoDkmgDUYidCvABz5zvLhET3TVLKJ55kbBM7743AsC5OAOfL04RgJipc/s800/rss.png' width='50'/></a></center></div>
</div>
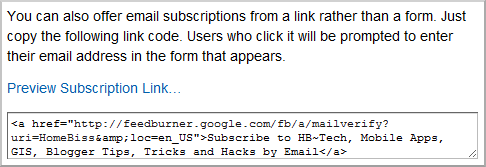
Please pay attention to the ones colored in green and red. The one colored in red must be replaced with your FeedBurner (hope you’re using one!) URL while the one colored in green must be replaced with your FeedBurner-powered email subscription link. You can find it from your feed’s dashboard at FeedBurner, right under ‘Publicize’. Look for something that looks like this:
http://feedburner.google.com/fb/a/mailverify?uri=HomeBiss

I must also mention that the Twitter Tweet button that your visitors will be using after this installation is the iframe-based Tweet button, not the nasty JavaScript-based one. Please follow the link that I have provided earlier for more details about the iframe-based Tweet button.
Now look for ]]></b:skin> in your Blogger template and place the following code (jQuery) right after it.
<script src='http://ajax.googleapis.com/ajax/libs/jquery/1.7.0/jquery.min.js' type='text/javascript'/>
Once a while or maybe at least once a month, visit Google Libraries API and look for jQuery updates. The current version is 1.7.0 and it might get revised or updated after some time.
Now you may place the following JavaScript code. Place the whole block BEFORE your HTML </head> tag.
<script type='text/javascript'>
$(document).ready(function() {
var $sidebar = $("#putra-lrt"),
$window = $(window),
offset = $sidebar.offset(),
topPadding = 20;
$window.scroll(function() {
if ($window.scrollTop() > offset.top) {
$sidebar.stop().animate({
marginTop: $window.scrollTop() - offset.top + topPadding
});
} else {
$sidebar.stop().animate({
marginTop: 0
});
}
});
});
</script>
At last! We’re down to the last step and this one should be familiar for most bloggers. Just copy the whole block of CSS rules and place them in your embedded style sheet (aka Blogger template).
#putra-lrt {
float: left;
margin-left: -86px;
background: #f2f2f2;
position: absolute;
-moz-border-radius: 5px;
border-radius: 5px;
}
#putra-lrt .station-rs {
float: left;
clear: left;
padding: 5px 5px 0px 7px;
}
#putra-lrt .station-er {
float: left;
clear: left;
padding: 5px 5px 0px 11px;
}
#putra-lrt .station-ma {
float: left;
clear: left;
padding: 5px 5px 0px 12px;
}
#putra-lrt .station-bt {
float: left;
clear: left;
padding: 5px 5px 0px 8px;
}
#putra-lrt .station-tw {
float: left;
clear: left;
padding: 5px;
}
#putra-lrt .station-fb {
float: left;
clear: left;
padding: 5px 5px 0px 10px;
}
#putra-lrt .station-gp {
float: left;
clear: left;
padding: 5px 5px 0px 13px;
}
Pay attention to the one colored in orange. You may have to play with the value over there to get the perfect fit for your floating social sharing buttons widget on your blog. Fine tune until you’re happy with it! :)
Problems?
If you run into any problems in installing the new, improved floating social sharing buttons widget, please let me know as soon as possible via comment down below.


17 comments:
Very Nice....
Awesome widget
Zeeshan,
Thank you! :)
i have installed the same from a other site tutorial but its on left side i want to change the postion to right as you what are the codes to change..here is the link
www.premiumnewaccounts.blogspot.com
Premium,
Changing the position to the right-hand side like what I have done?
Hmm... Explaining it would require you to follow some tricky, step-by-step instructions. I will consider writing a post to document the steps in the near future. I'm very busy right now, planning a much-deserved vacation! :)
haii .. a good tutorial. I have the problem section first step. I already follow the step by step according to your suggestions. but.. did not work either. is there another way besides placing script before <data:post.body/>. thank you
Angga Bayu Prasetya,
There's a good reason why the codes must be placed before <data:post.body/>.
What kind of errors/problems you're facing in that section?
I did all of the steps except I am confused about the location of last step when it says to past the following code in the embedded style sheet (aka blogger template). Isn't the entire thing taking place in the blogger template? Where specifically in the blogger template should the code go? I have tried it in a few places and the floating share widget is not appearing...
Jon Haines,
Yes, the codes should be placed inside your Blogger template, anywhere between <b:skin><![CDATA[/* and ]]></b:skin>
homebiss, for some reason that didn't fix it. There is no "/*" after "[CDATA[ either on my script. Also there are two of "" in my script and none if I don't expand the widgets. I had to put the first bit of code before the second "" because the first would screw up the page. I'm not quite sure what's going wrong because I have followed your instructions quite meticulously and I'd really like to get this widget to work... there is simply no floating widget appearing.
Jon Haines,
I took a peek at your Google+ profile just now and found one link that leads to your Blogger-powered blog. I'm going to assume that you're having problems on that blog. By the way, you already have a good looking floating social widget on that blog. Do you still want to use the version I have here?
If yes, you have to let me take a closer look at your Blogger template. Copy your full Blogger template and save it as a common text file. You may zip it up and send it to me via my Google+ email link.
haii .. sorry for too long gives you an error in the template know me.
My blog template containing 3 <data:post.body/>. So .. Can you give me the solution?
I got problem
Your template could not be parsed as it is not well-formed. Please make sure that all XML elements are closed properly.
XML error message: The value of attribute "href" associated with an element type "null" must not contain the '<' character.
I followed all instructions right.
in last one i pasted it immediately after <![CDATA[/*
in first paragrah of page plz help me
hello!
I acted on every instruction and after 3 attempts failed i was using template travel in blogger does it apply to that?
after doing every thing right the post disappears and looks empty nothing is displayed on sheet.
so I undone changes. my blog http://medicalentrytest.blogspot.com I want this plz help
Nice Info, Thanks
Do not do this to your site visitors. These often float down as visitors are trying to read content partially obscuring said content. They are very distracting and annoying.
Anyone that thinks floating moving eyesores like this are 'nice' has no taste.
samantha,
Thank you for your honest opinions. :)
Post a Comment